Preface
I used to find Nginx configuration cumbersome, and after using Cloudflare Tunnel and enjoying the sweet automatic reverse proxy and HTTPS, I didn’t want to touch Nginx. However, Cloudflare Tunnel is not a silver bullet; its support for certain services can be finicky.
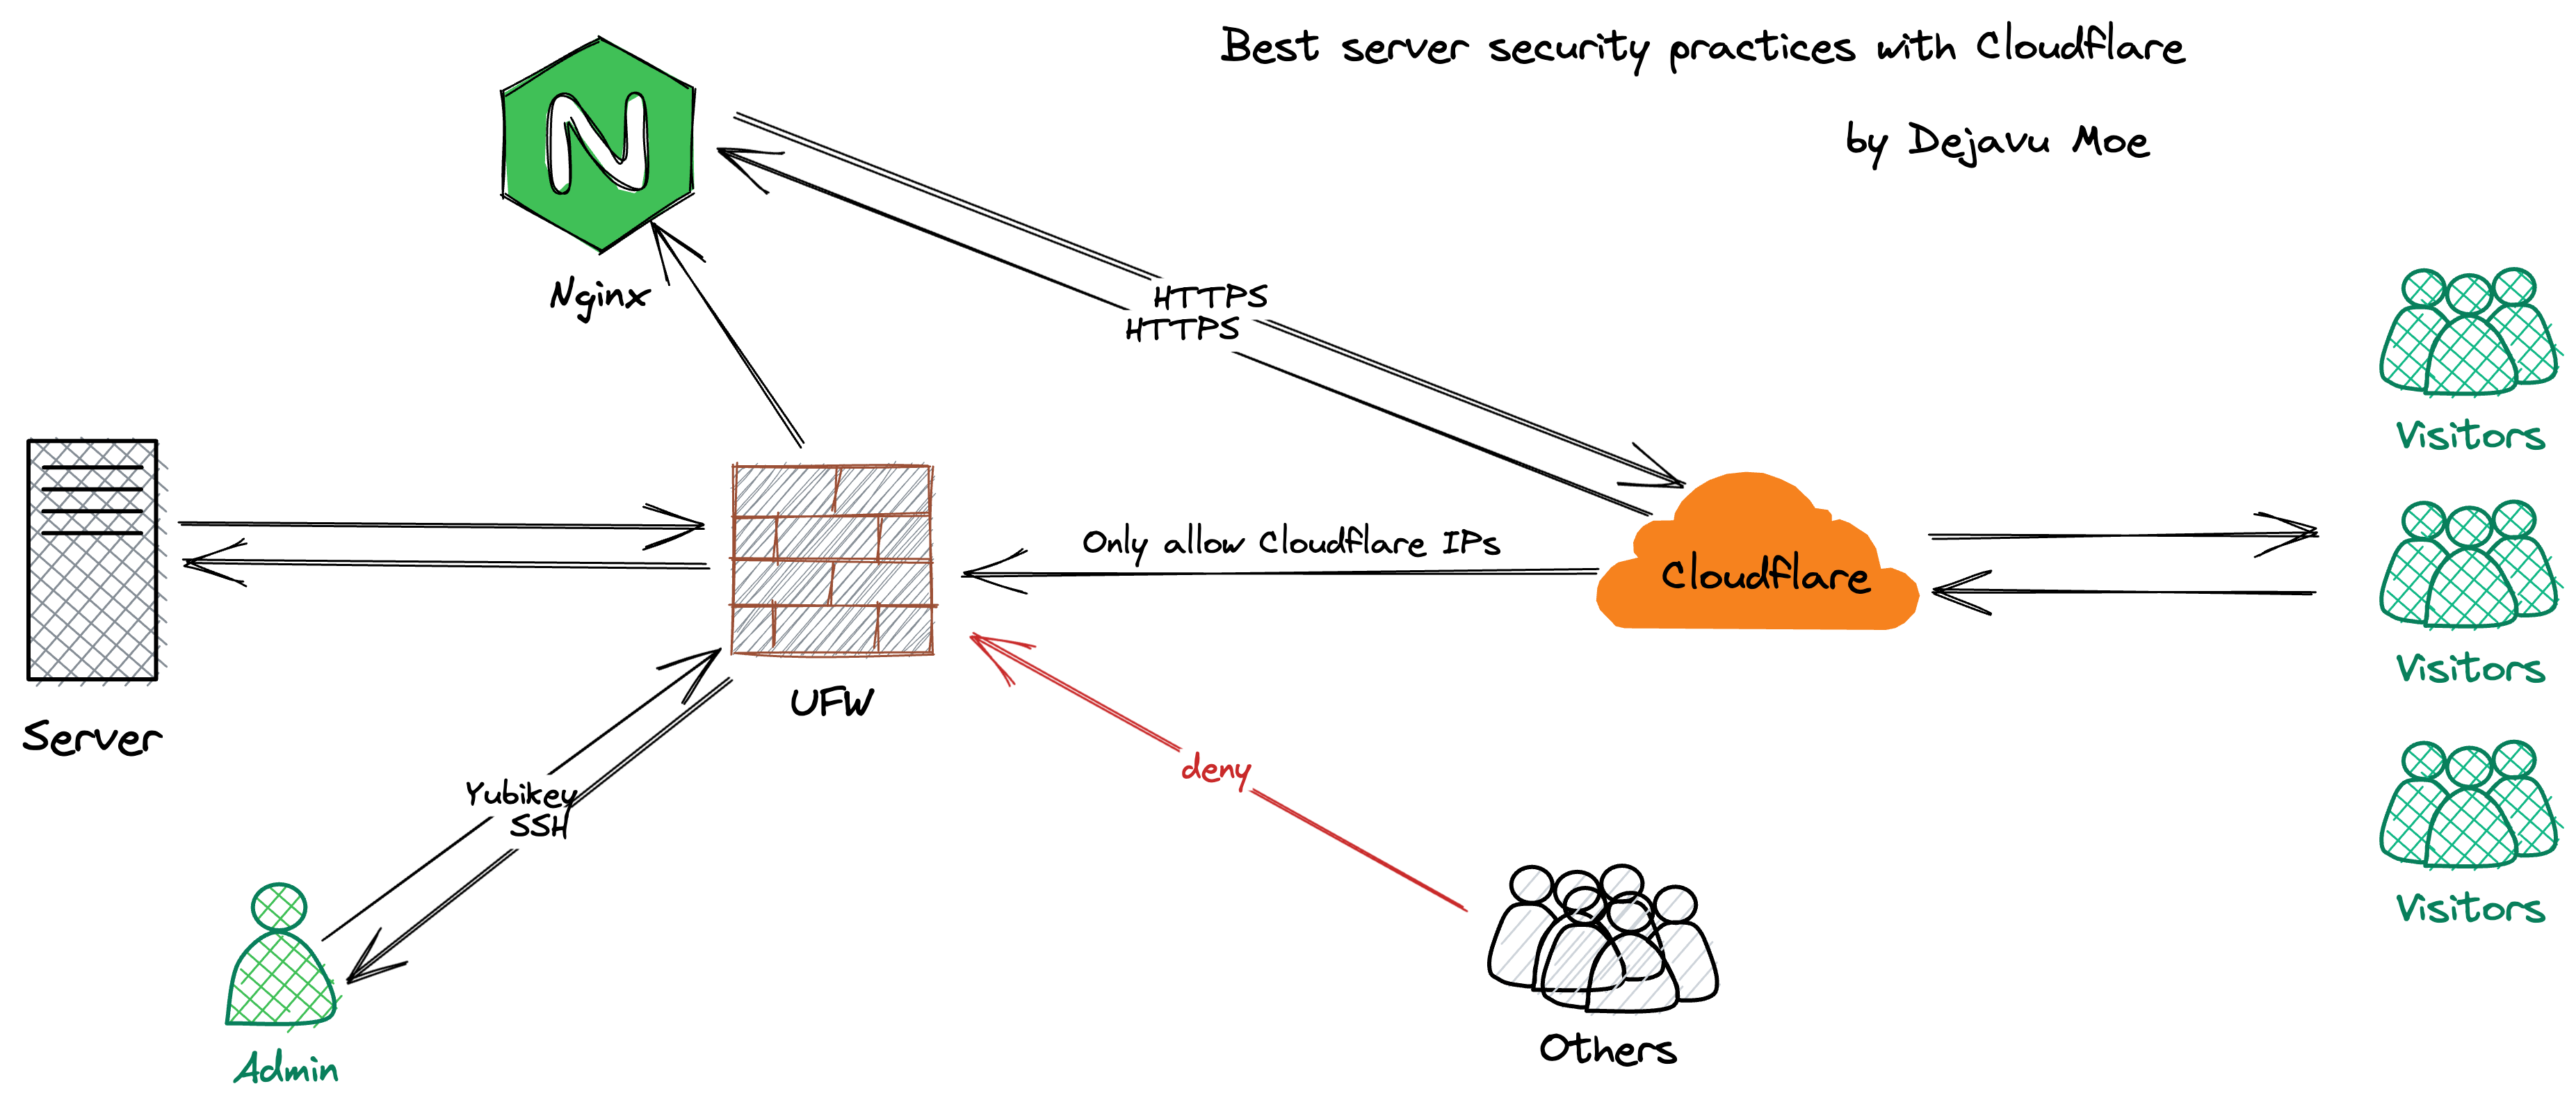
Recently, for larger services, I tried combining traditional Nginx reverse proxy with Cloudflare CDN for access. Thanks to Cloudflare’s Origin Certificates, deploying fully-fledged HTTPS became simple without needing CertBot or acme.sh, while Cloudflare handles automatic issuance, deployment, and updating of Edge Certificates.
In this article, I will document my straightforward practice, which also helped me get familiar with Nginx usage—it is actually quite simple.1
SSH Security
SSH is the gateway to our servers. There are two ways to protect access to it:
- Close the SSH port and rely on Cloudflare Tunnel for SSH access.
- Keep the SSH port open with proper SSH hardening.
Method 1 is undoubtedly the most secure 2, but SSH quality depends heavily on Cloudflare service uptimes: e.g., Cloudflare Tunnel degradations, local cloudflared panics 🥹, etc.
Method 2 involves standard SSH hardening:
-
Change the default SSH port
-
Forbid empty password logins
-
Disable root logins
-
Use public/private keys for SSH access (hardware security keys preferred) 3
-
Configure Fail2ban
Configure UFW
Generally, besides the SSH port, we only open HTTP (80) and HTTPS (443). First, block other ports in the cloud dashboard, then apply IP filtering.
UFW is a frontend that simplifies configuring the underlying Linux firewall. Extremely easy to use, installed by default in Ubuntu, but requires manual install on Debian:
|
|
Step 1 is to allow the SSH port (replace 9912 with your actual SSH port):
|
|
Step 2, deny all incoming traffic:
|
|
Step 3, allow ports 80 and 443 exclusively for Cloudflare IPs. Manual typing is tedious, create a script instead:
|
|
Edit the script:
|
|
Write the following items and save:
|
|
Execute the script:
|
|
Enable UFW:
|
|
Reload UFW rules:
|
|
Configure Nginx
To ensure our services still obtain the visitor’s real IP through Cloudflare CDN, Nginx configuration needs tweaking. First, back up the default file:
|
|
Edit the default Nginx configuration file:
|
|
Find the section below:
|
|
Add the following fields: 4
|
|
Test the Nginx configuration:
|
|
If successful, reload Nginx:
|
|
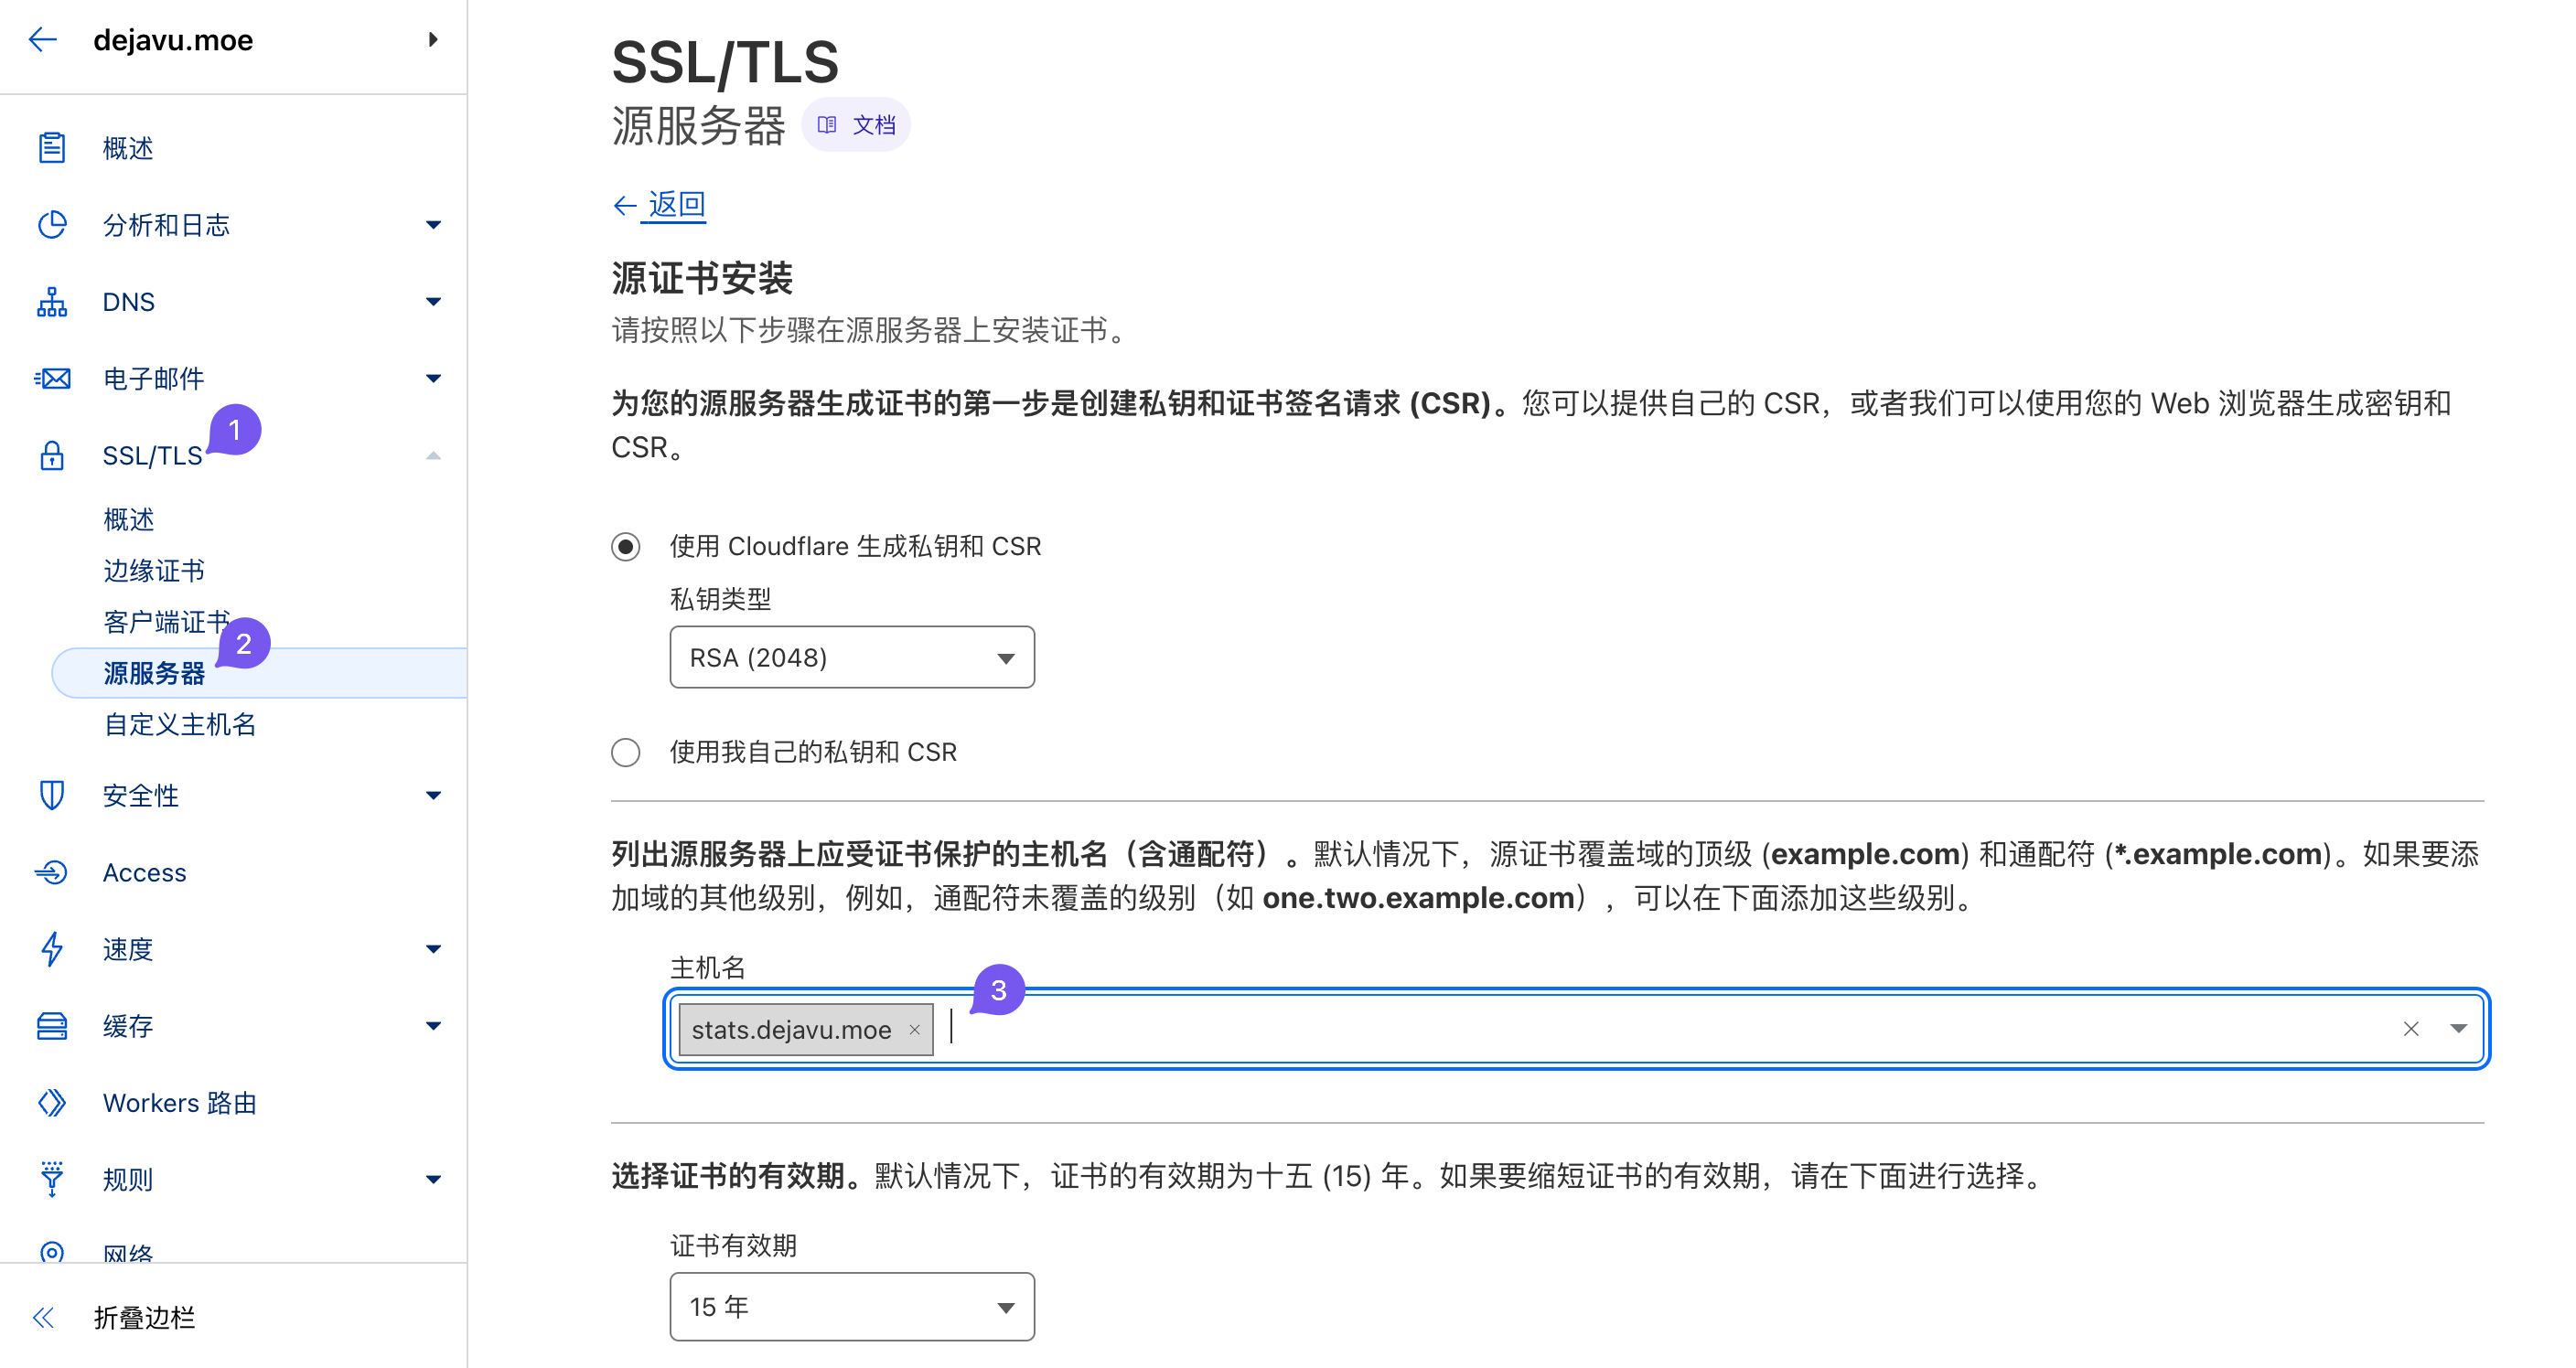
Origin Certificates
Generate an Origin Server SSL certificate on Cloudflare (valid up to 15 years max), trusted only by Cloudflare itself.
Then install it on your Web Server. Taking Nginx reverse proxy for Plausible as an example:
|
|
Create a cert directory where all certificates will reside:
|
|
Create certificate files for the domain stats.dejavu.moe:
|
|
Edit public and private key files separately, insert the origin certificate data inside and save:
|
|
Create the Nginx config file:
|
|
Origin cert installation layout:
|
|
Check the config; if clean, reload Nginx:
|
|
Finally, resolve the domain to your server IP in Cloudflare panel setups and set SSL/TLS Encryption Mode to Full (Strict).
References
-
Never know unless you try 🤤↩︎
-
Assuming you fully trust Cloudflare↩︎
-
e.g., Yubikey, Canokey, FeiTian Key…↩︎
-
Cloudflare IP ranges rarely diverge; as of writing, the last change was April 8, 2021↩︎